Tutorial: openSuSE 12.3 Installation
In this step-by-step tutorial we cover openSUSE 12.3 installation using a 32-bit Live Linux KDE desktop image. The installation of the 64-bit version will be the same as this guide. I will try to explain certain options and provide helpful hints along the way, so rather than just following the guide, you can understand the reasoning behind the decisions.
If there are any mistakes please draw my attention to them and I will correct as needed. I have tried to make this as simple as possible, whilst covering the vast majority of scenarios users will come across whilst installing this operating system.
Step 1
The first thing you should do is head to the openSUSE website and download the openSUSE 12.3 installation KDE Desktop Live ISO image from the openSUSE download page, titled openSUSE-12.3-KDE-Live-i686.iso.
Step 2
Using your disc burning software, burn the .iso you downloaded to a DVD. Those that prefer to use USB media can use the official USB preparation guide on the openSUSE website to create a bootable USB device.
Step 3:
Before you go any further, ensure all important data is backed up in case of data loss on your drives. This guide assumes you have media backups of your hard drives and you are safe to proceed.
Warning: Installing another operating system without first ensuring you have backups of your current files and operating system is a big risk. If you have no data to lose or you’ve backed up important data, you’re ready to proceed. YOU are responsible if you lose data.
For those of you using Windows, and installing Linux for the first time I recommend you either use a separate hard disk that does not contain the Windows OS, or create a partition big enough for Linux within Windows using Disk Management in the Administrative Tools menu of the control panel. 20GB of hard disk space is absolutely plenty of space for you to begin exploring openSUSE whilst at the same time having room to grow.
It goes without saying, that I accept no liability or responsibility for any errors or damage to your computer during, or after installing Linux. It is up to the user to ensure proper backups are made of important documents and files and this tutorial assumes these have already been done and verified.
Step 4
Ensure you have a network cable connected, restart your computer, and boot from the DVD drive.
Step 5
The DVD will begin to load up, and you’ll be presented by the following box:
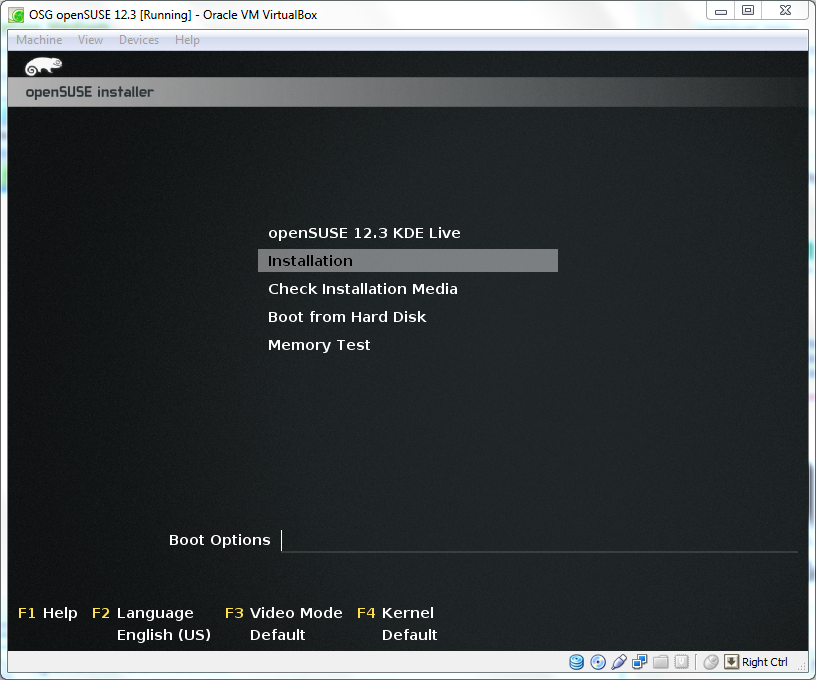
Using the arrow keys on your keyboard select the “Installation” option and hit the return key.
Step 6
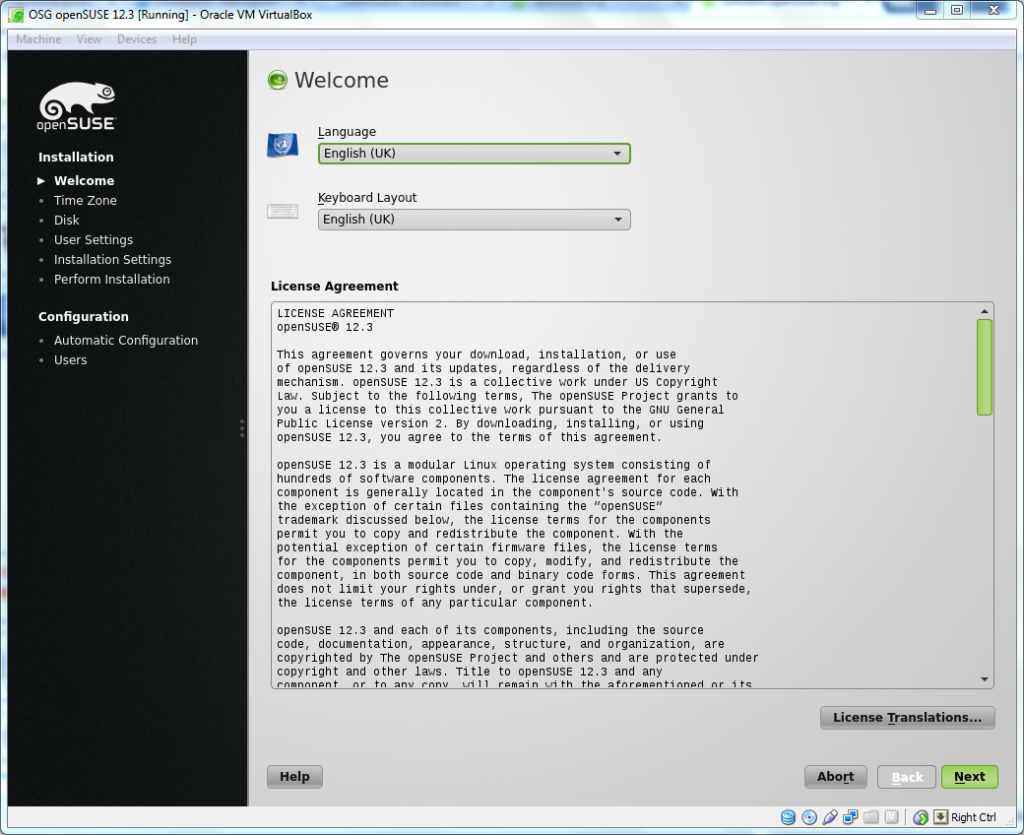
The installer will then load up and initialise the graphical environment, beginning the openSUSE 12.3 installation. After a short while, you will be presented with the following box:
Step 7
Select the correct default language and the most appropriate keyboard for your location and click “next” to proceed.
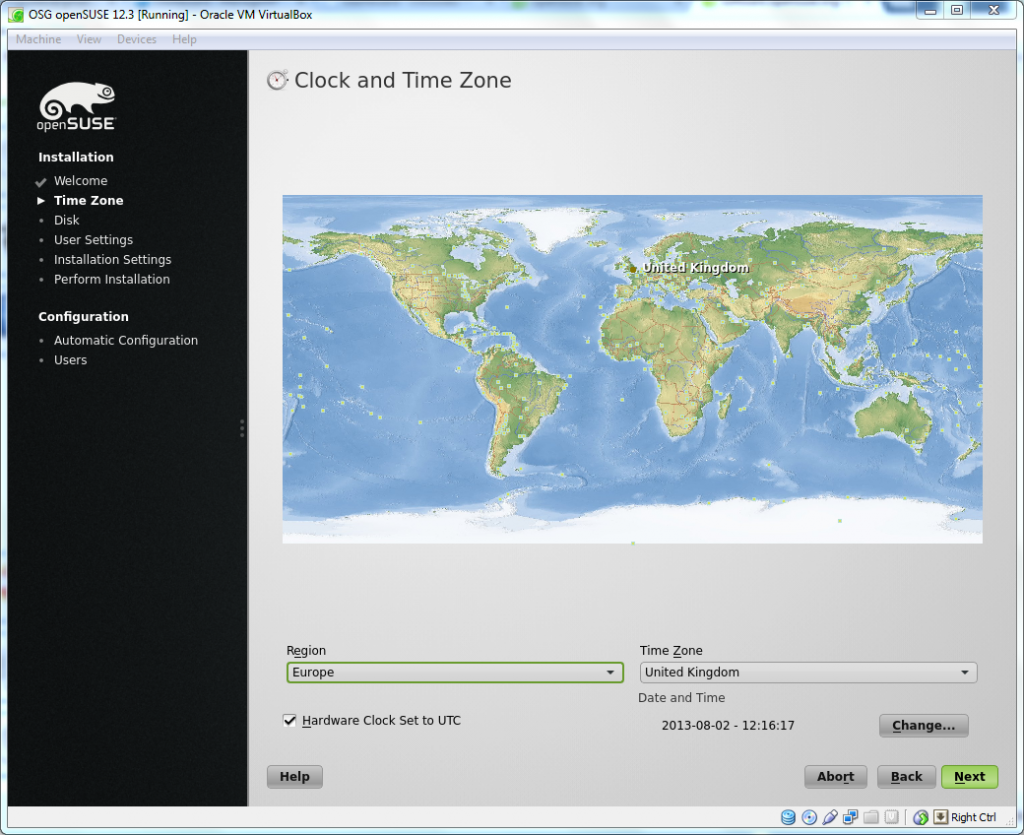
Choose your location and time zone, then confirm the clock is correct for your locale. Click “next” to continue with the openSUSE 12.3 installation.
Step 8
Next up is the partitioning screen as below:
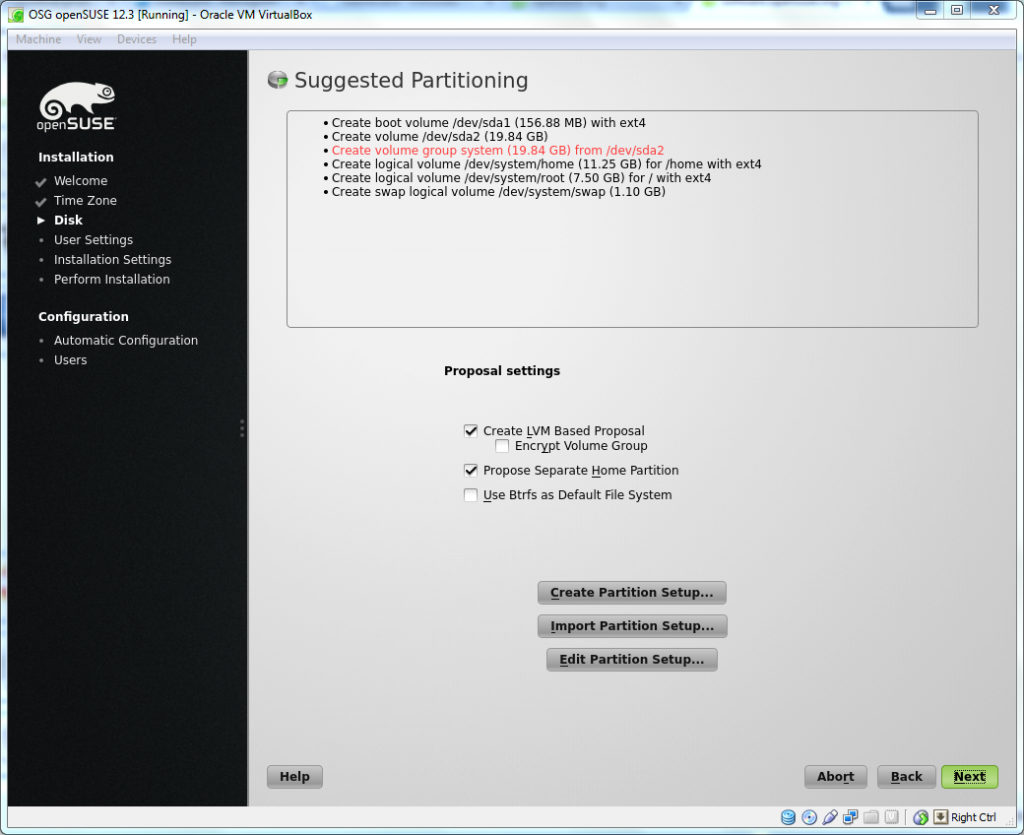
In most instances, the installer will automatically provide the best settings taking into account the number of hard drives and other operating systems present. I highly recommend you select “create LVM based proposal” and use the “propose separate Home partition” options.
Logical Volume Management (LVM) provides more flexibility with partition management, by enabling on-the-fly drive maintenance, such as deploying further disks and adjusting partition sizes as data storage requirements increase.
In this guide, the installer is preparing a single hard drive for usage with openSUSE. Those looking for further flexibility can edit the suggested partitioning scheme by clicking “edit partition setup.”
Click “next” to move to the next step.
Step 9
You will now be asked to create a user account for the openSUSE 12.3 installation, as below:
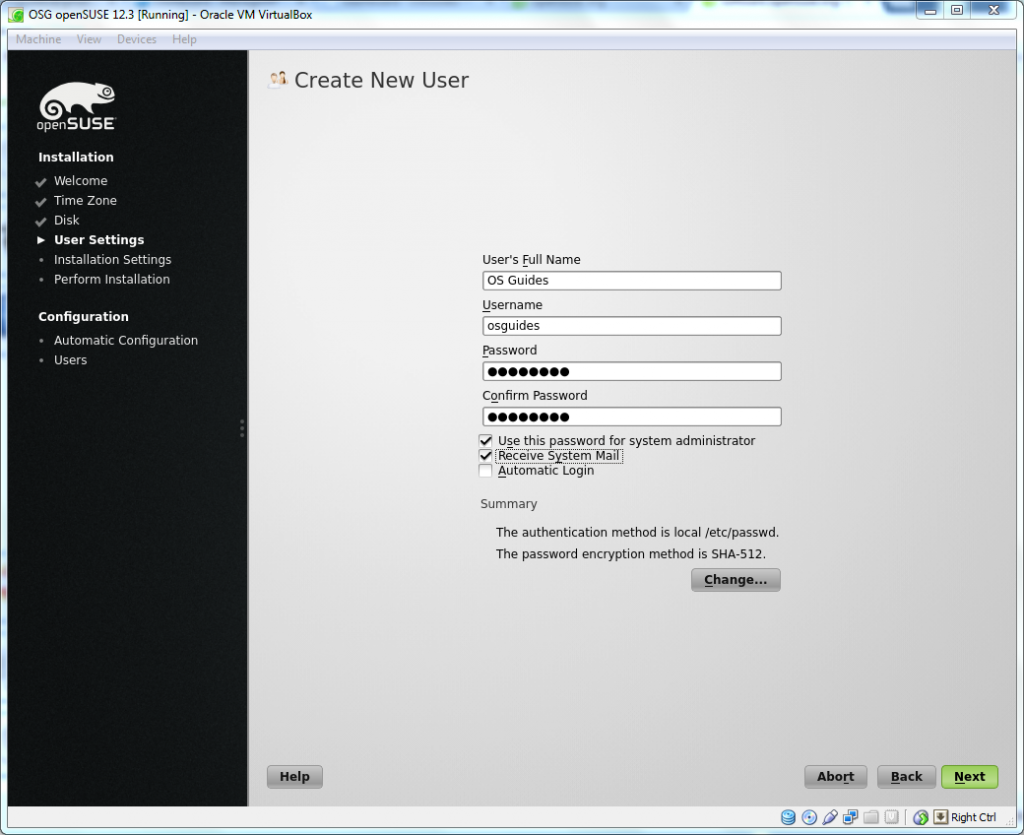
Complete the fields and type a password for the account. The default option for “automatic login” should be disabled and it is recommended that you select the first two options, “use this password for system administrator” and “receive system mail” especially on single-user computers.
The default authentication method is perfectly acceptable. Then click “Next” to proceed to the next step.
Step 10
The next screen will display a summary of installation settings as below:
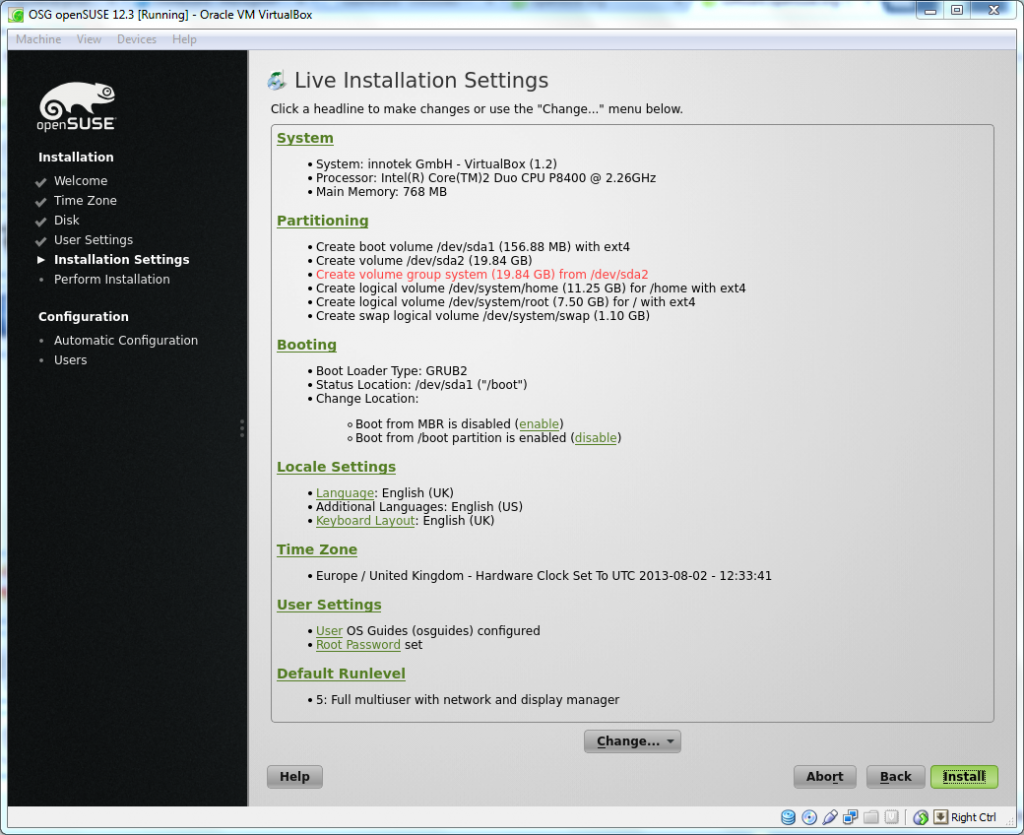
Most of the settings should be correct, but the default settings for the bootloader will require changing in most instances. Click on the “Booting” to proceed.
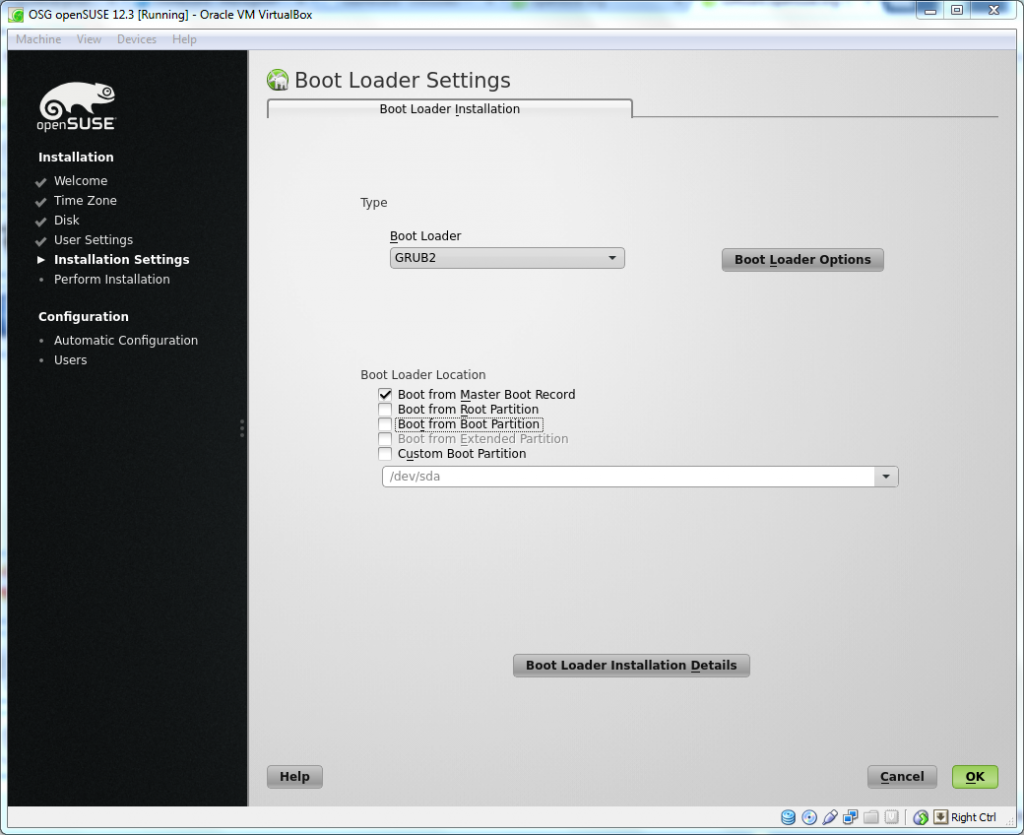
Ensure the “boot from Master Boot Record” option is ticked as detailed in the above image, and click “OK” to confirm the changes. The openSUSE 12.3 installation summary will load again and should now show the changes to the booting options, as below:
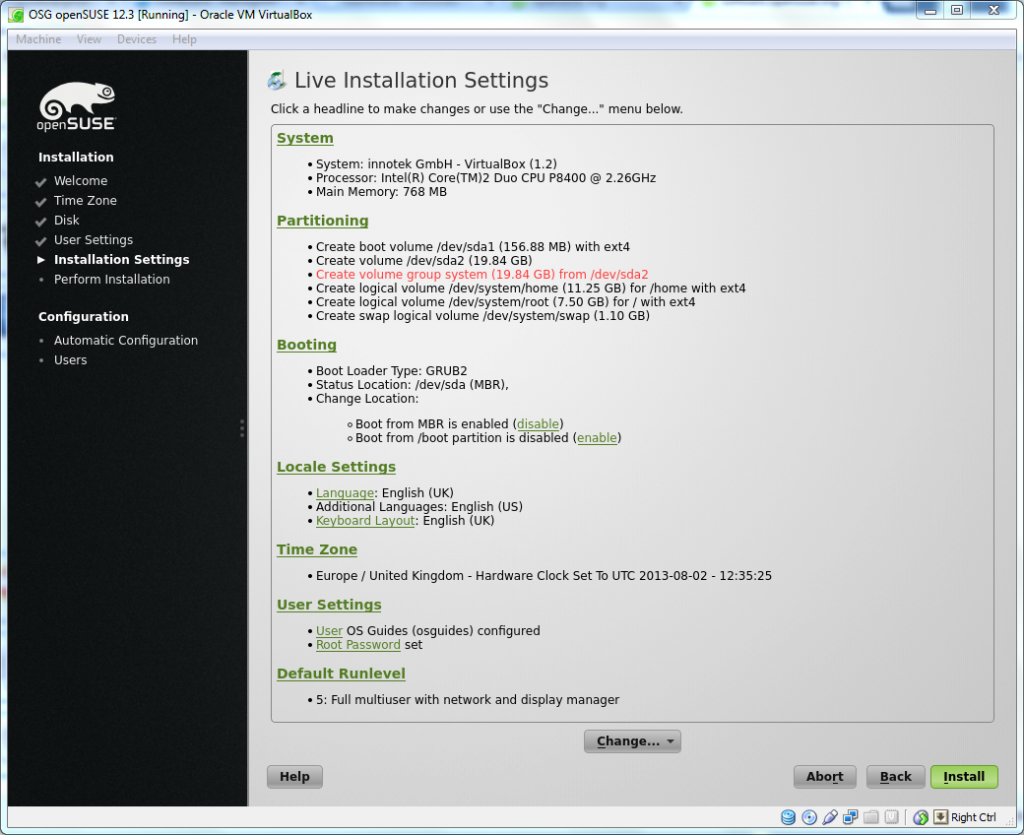
Click “Install” to proceed and you’ll be asked to confirm the settings in a separate pop-up box, as below:
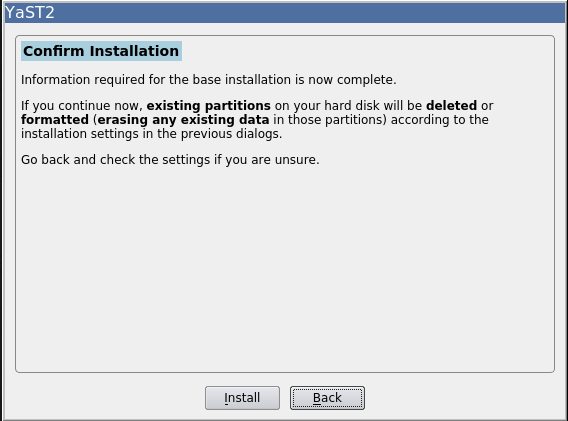
Click “install” to begin the copying phase of the openSUSE 12.3 installation. The time it takes to complete varies, and progress will display on the screen below:
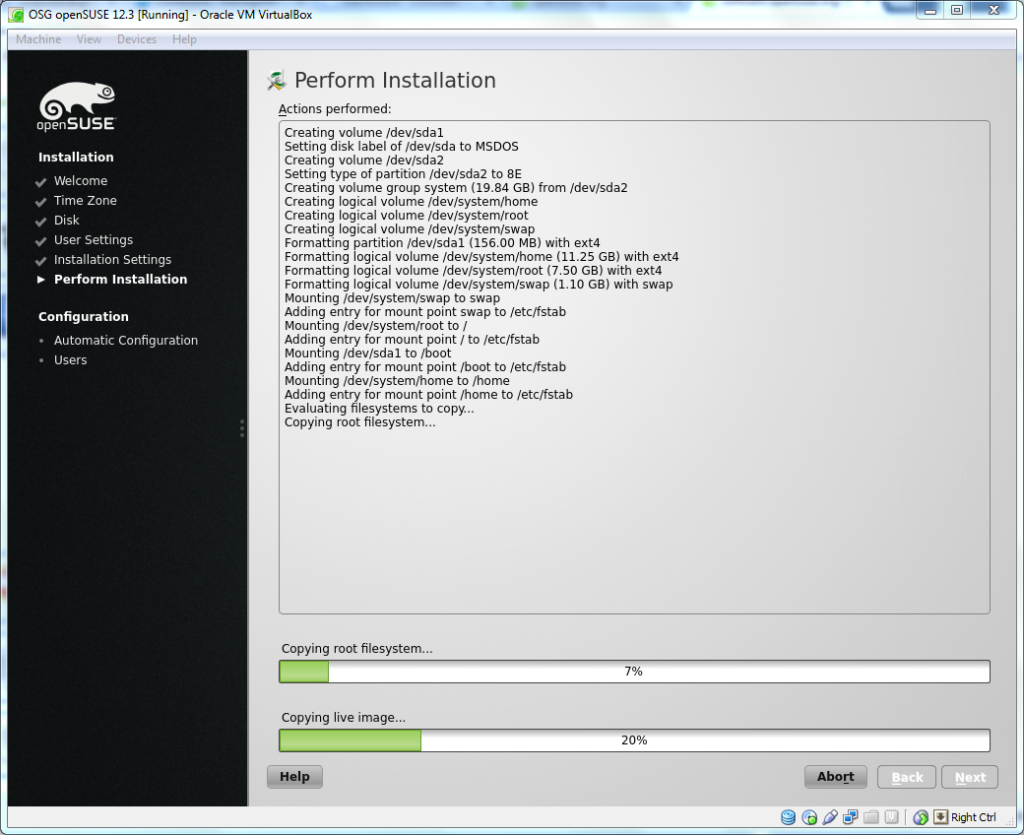
Once it has finished the following pop-up box will appear:
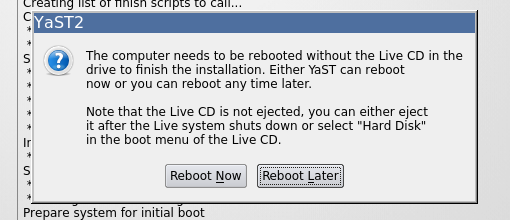
Select “Reboot now” and remove the DVD when requested.
Step 11
Once BIOS completes POST you will see the following bootloader screen:
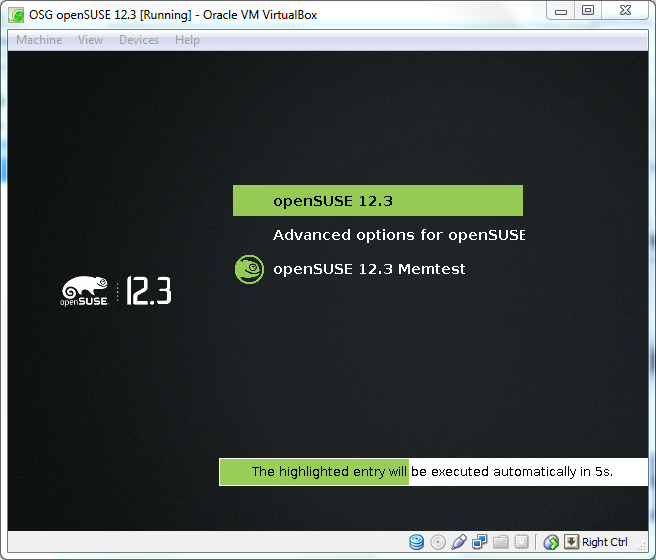
Windows will appear in the menu on computers using both operating systems. The default option for booting Linux is openSUSE 12.3. Highlight it and press enter to start loading.
Step 12
An Automatic Configuration wizard will run the first time openSUSE starts, as shown below:
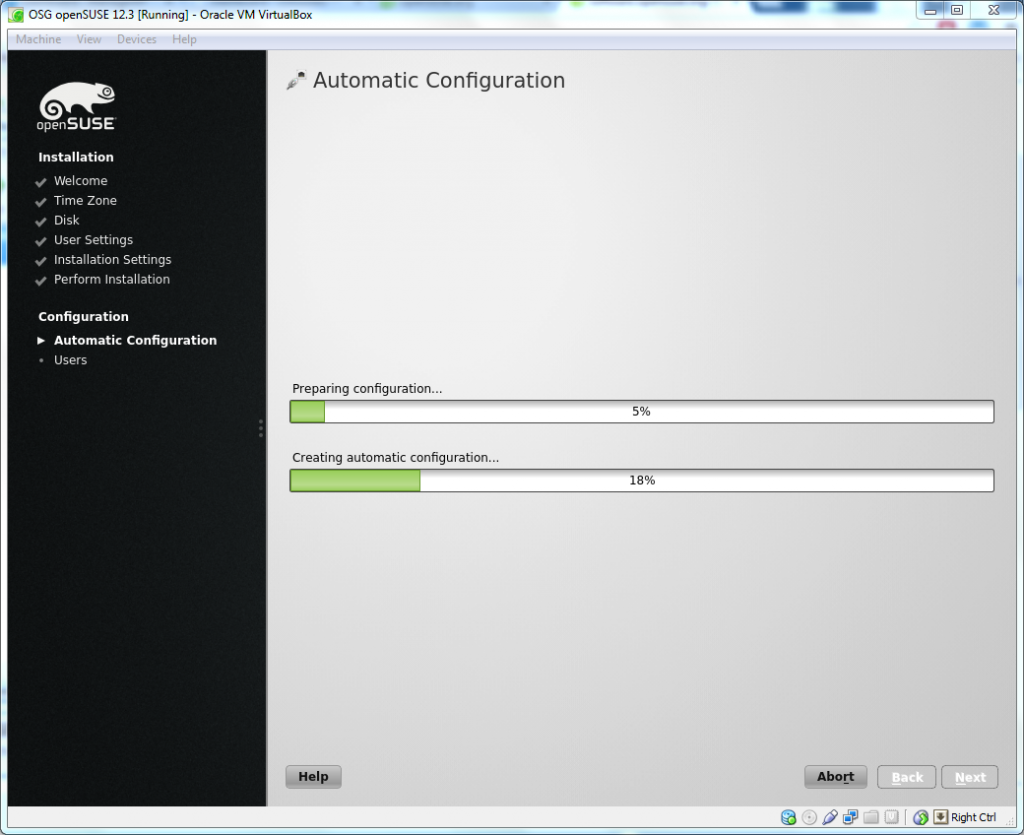
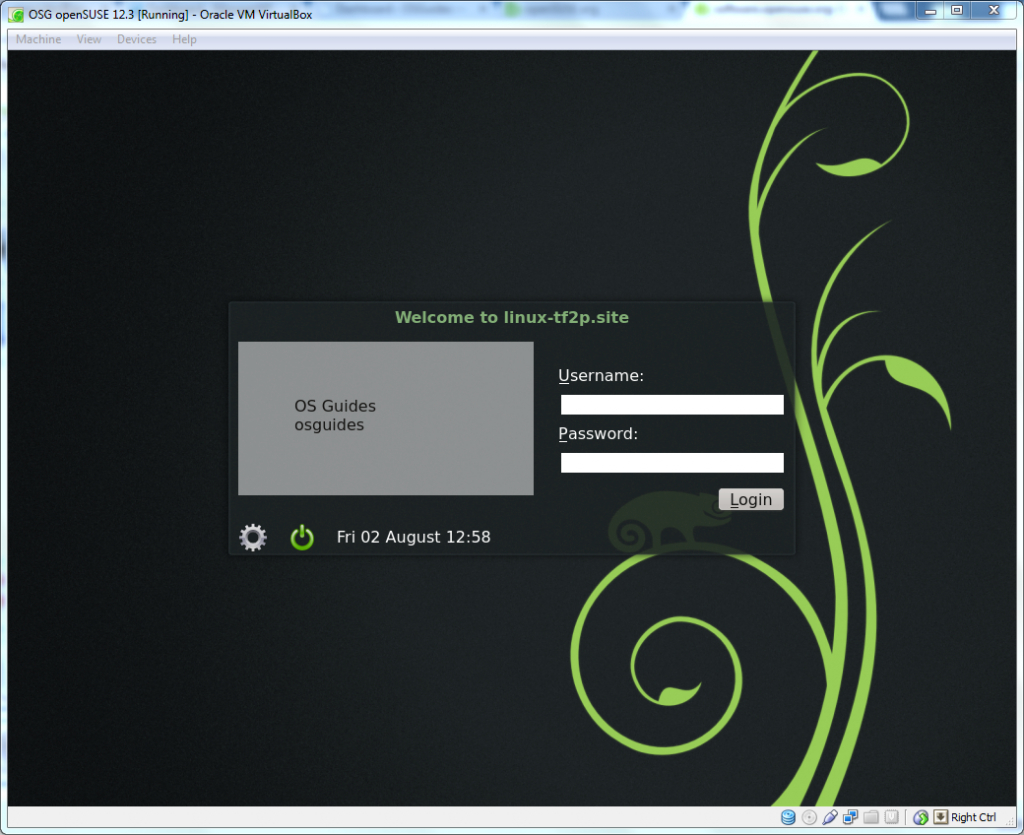
Once complete you will be presented with the following login screen:
Step 13
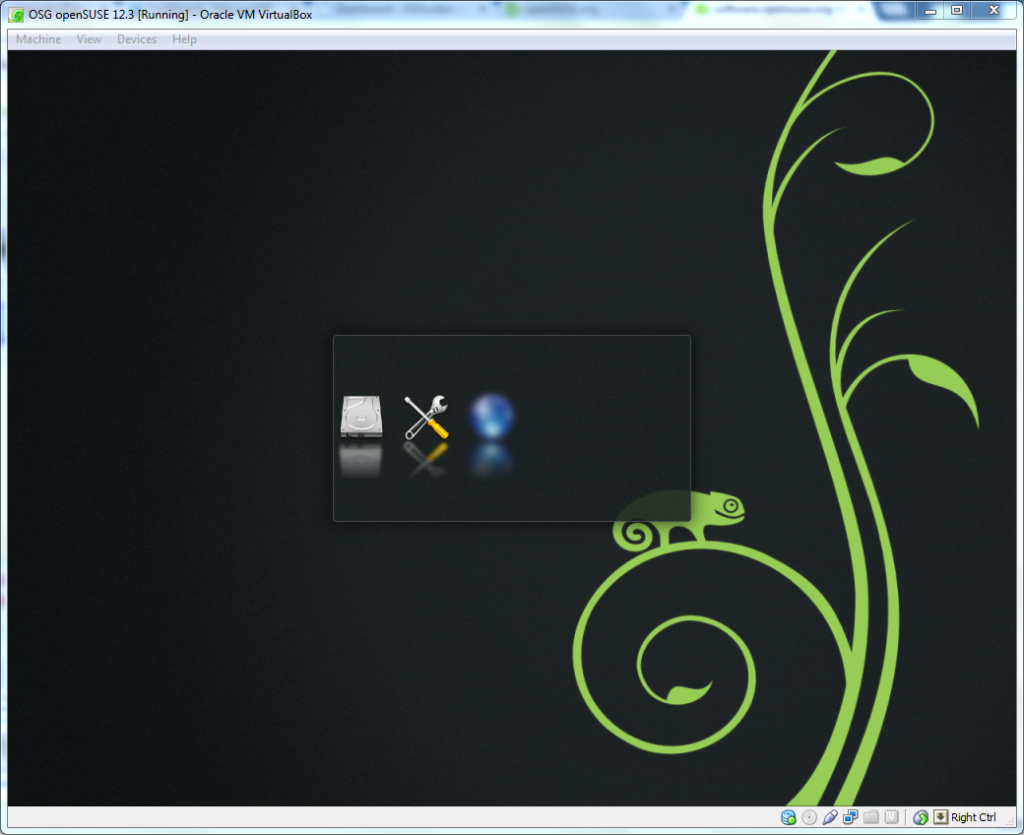
Select your username and enter your password to load your desktop. Several icons will appear as the desktop starts up, as shown below:
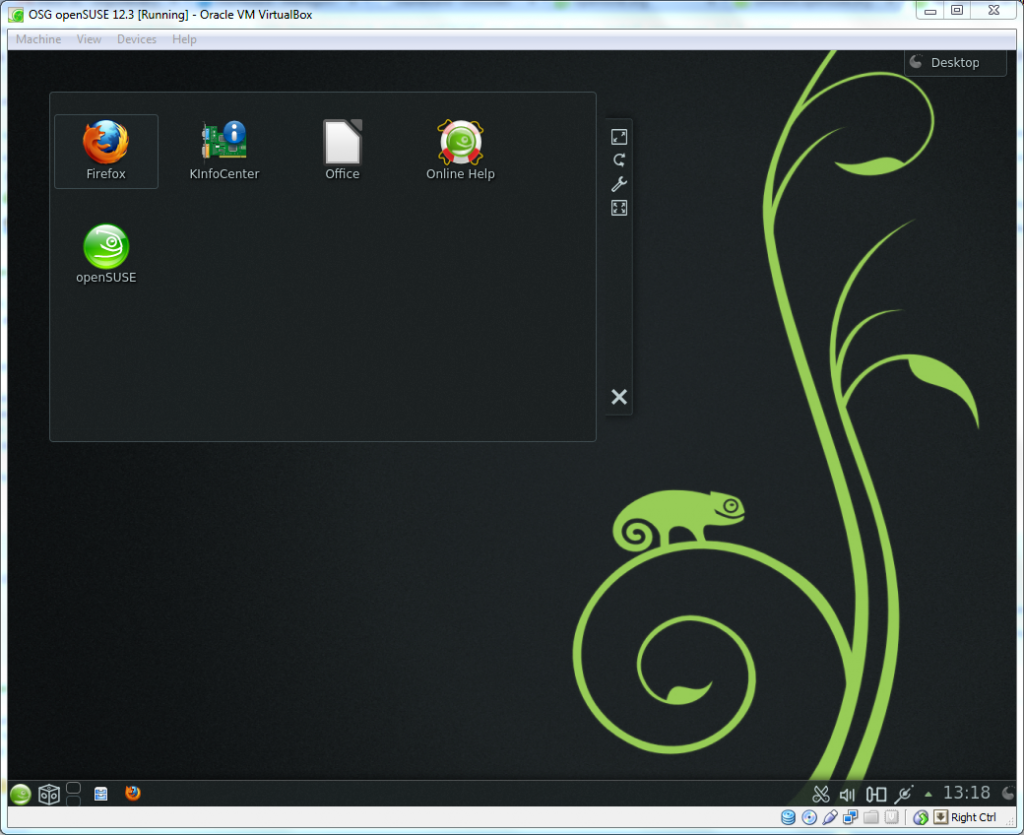
Once started the KDE desktop will appear and you can begin using openSUSE:
Step 14
Most users will soon realise that the network connection isn’t working. Resolving this is easily completed by initialising the network settings.
Click the menu button (the green icon located in the lower left corner of the screen) and select YaST. The following box will appear:
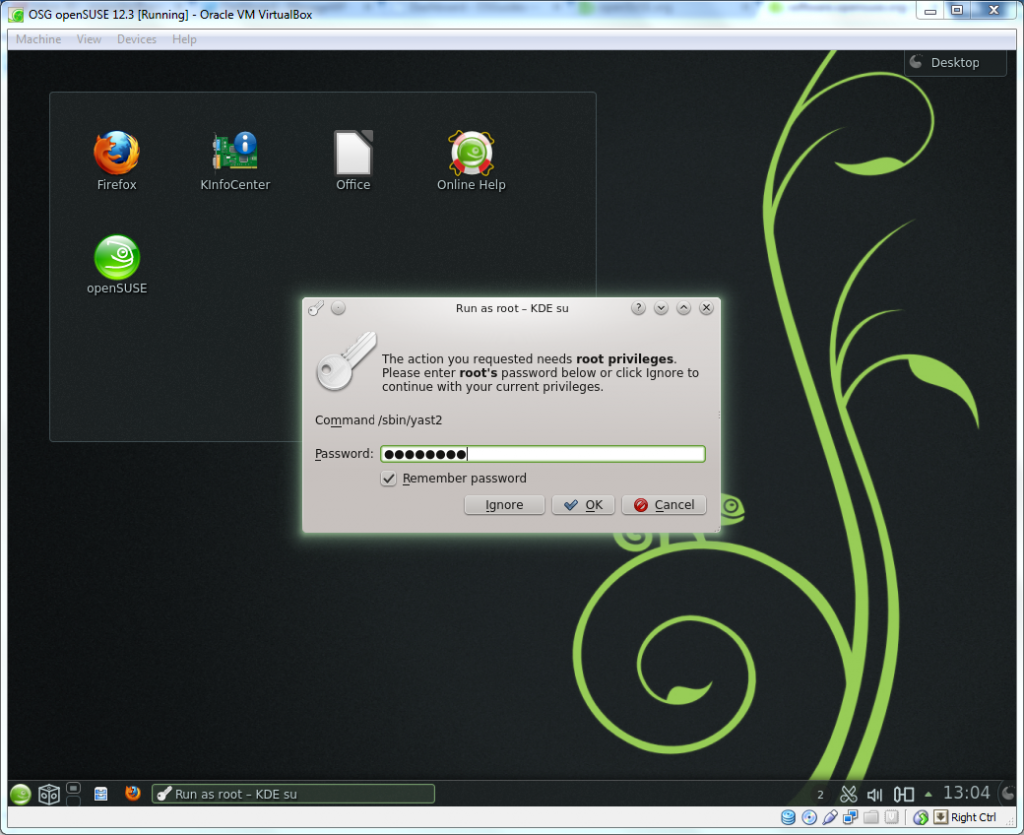
Fill in the password and click “OK” to proceed. YaST Control Center will then load up. In the search box type “Network” and select Network Settings.
The Network Configuration will then load up the various settings as shown below:
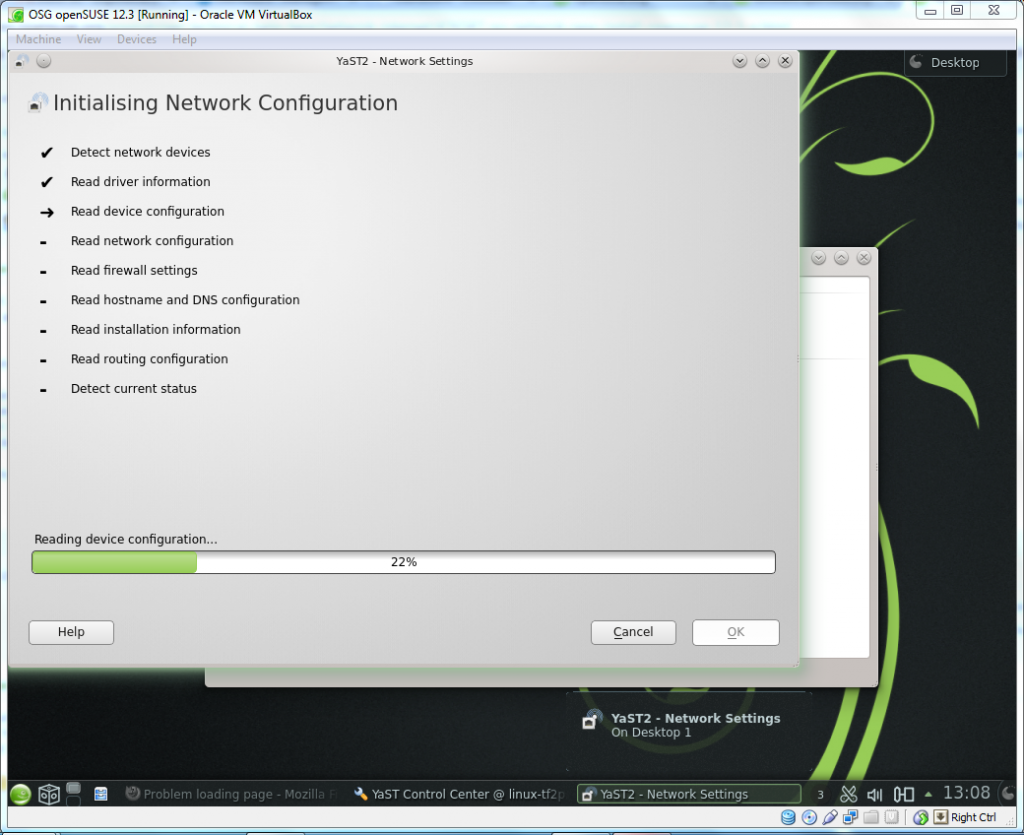
A pop-up box will then appear, as shown below:

Click “OK” to view the Network Settings menu, as below:
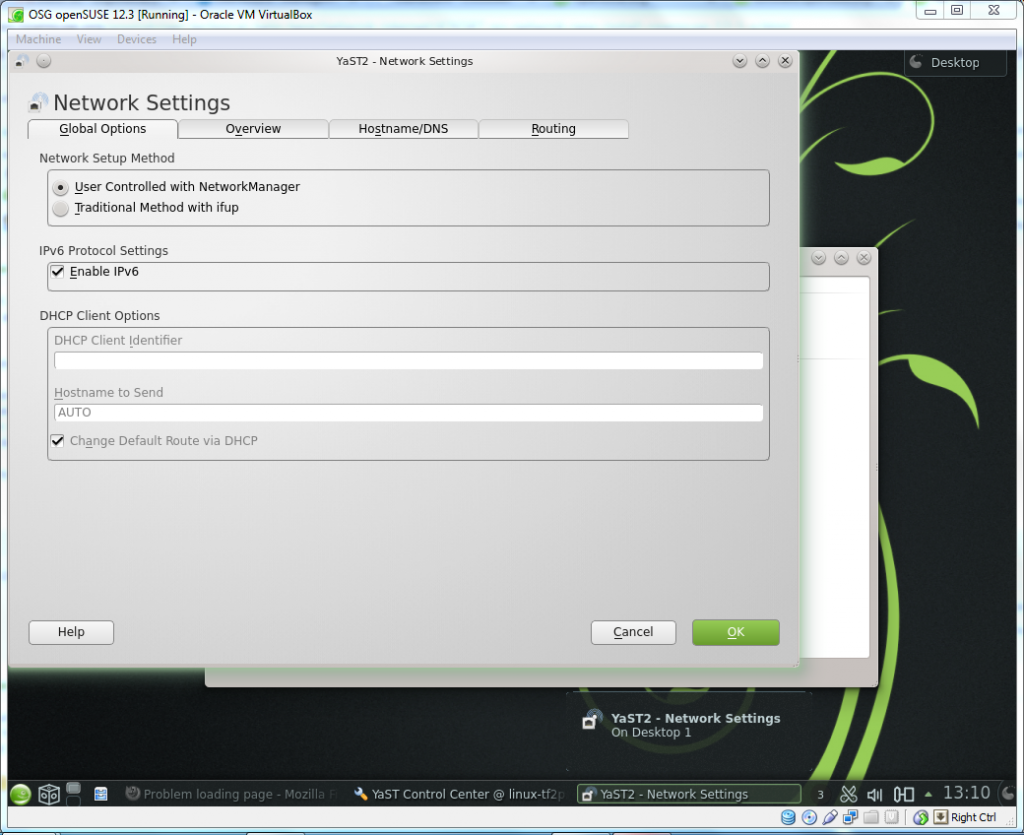
Click “OK” to accept the settings.
Step 15
Reboot your computer and the networking settings will begin operating normally.
The openSUSE 12.3 installation is now complete and you can begin exploring its features. The openSUSE 12.3 release notes contain further information regarding the improvements the latest version of openSUSE brings.
Feedback and comments are welcome. If you feel something is missing or you would like to see something in particular covered in future tutorials let us know in the comments section, or contact me directly.